
Waxable classic skiing is reliant on having the right skis that are fit correctly for you. Among the most important aspects of preparing classic skis for optimal performance is understanding how to test and mark them effectively. One essential component of this process is determining the ideal camber height for the ski's kick zone. In this article, we'll dive into the intricacies of classic cross-country ski testing and marking, focusing on the significance of camber height and the methodology behind it. The goal of kick zone marking is to help you achieve optimal grip without sacrificing glide, ensuring a smooth and efficient skiing experience.
Camber Height Basics:
Camber height refers to the distance between the base of the ski in the kick zone and the snow (or fit board in the shop) when the ski is weighted at even body weight. In classic cross-country skiing, the kick zone—also known as the grip zone—is where the kick wax is applied to provide traction while striding forward. The camber height and kick zone length both play in important role in how effectively the ski grips the snow.
Testing and Marking Process:
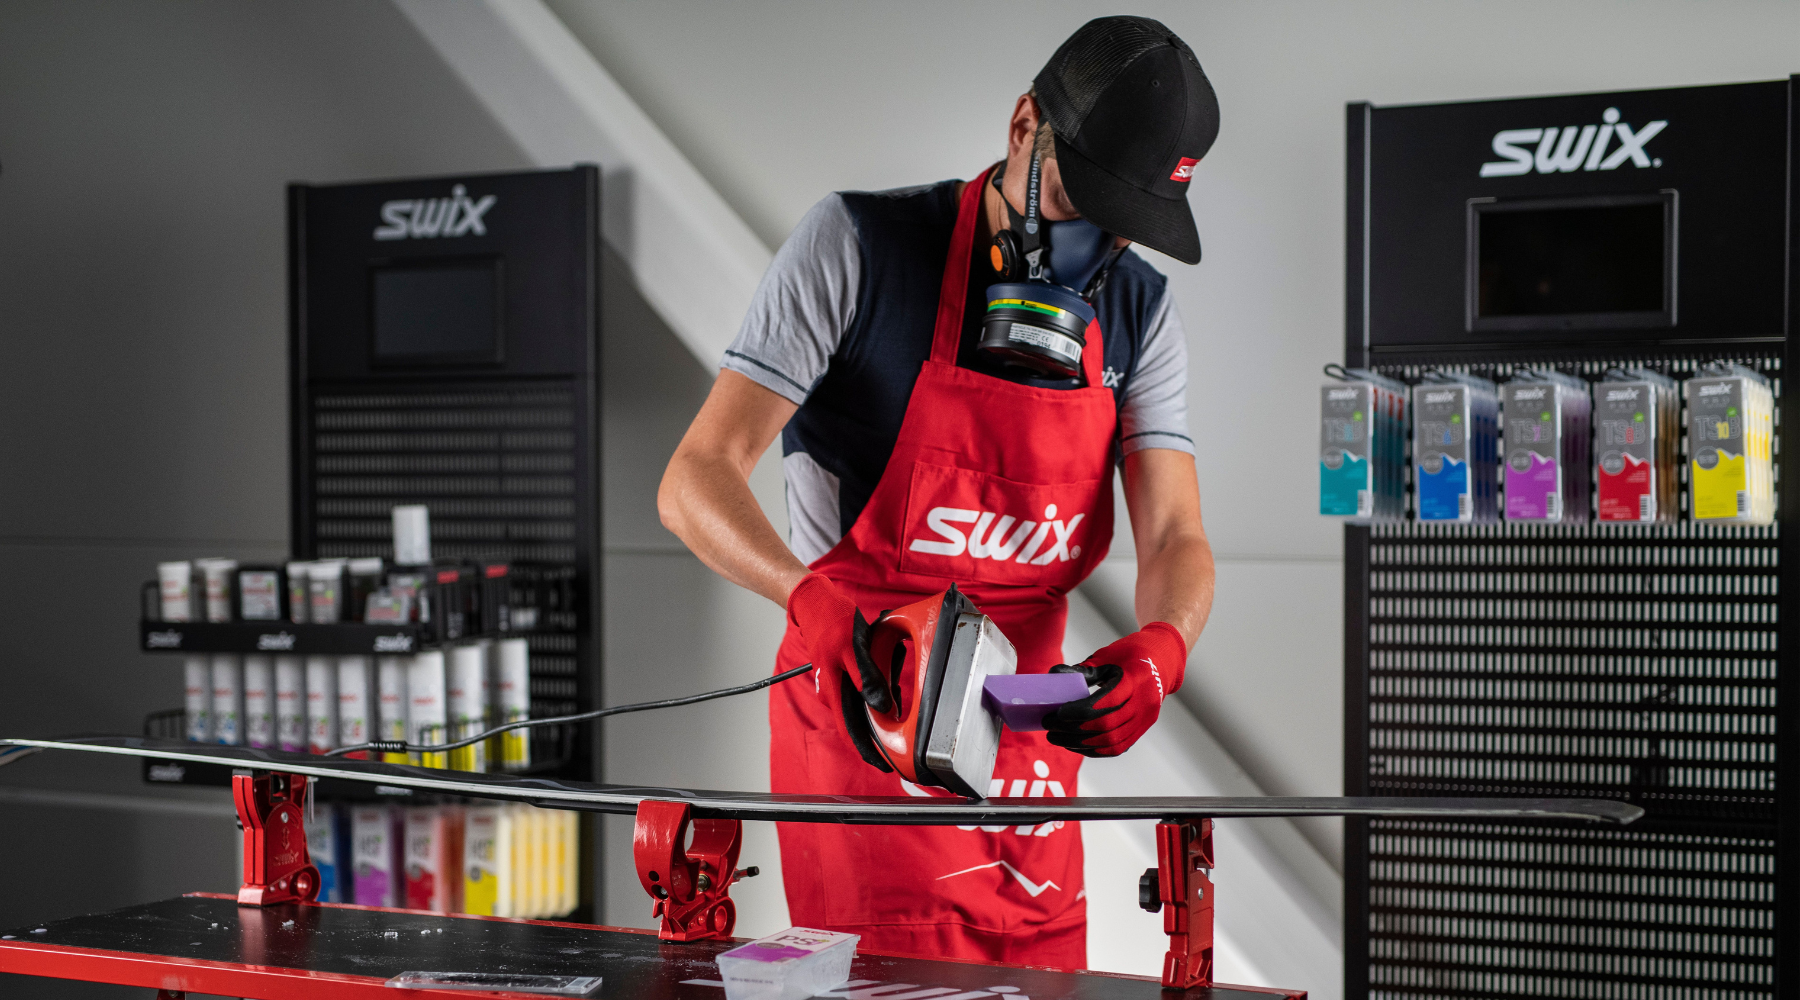
At Pioneer Midwest our testing and marking process involves assessing the camber height with our testing equipment to determine the appropriate kick wax application. This involves placing the ski on a firm and planed flat surface and using a pneumatic press to apply weight to the middle (where the ball of the foot and heel sit), simulating the pressure exerted when skiing. We mark the front of the zone with weight applied where the ball of the foot sit and we mark the rear of the zone with weight applied to where the heel sits. This shortens the kickzone slightly to reduce drag while still giving you a long enough zone that allows for solid kick.

*Skis being tested and marked at Pioneer Midwest

*We use feeler gauges at specific thicknesses to mark the zone
If you have received waxable classic skis from us, you likely have one of two styles of marking that are detailed and pictured below.

*0.2mm, 0.4mm, and 0.6mm marked on a classic ski
The first style of marking utilizes three different camber height markings of 0.2mm, 0.4mm, and 0.6mm in the front and the back of the kick zone. These measurements correspond to the height of the pocket at half of your body weight, which affects the ski's performance on varying snow conditions and terrain.

*H and K marked on a classic ski (may or may not have .2 and .4 marked)
The second style of marking is a more simple marking with just H and K indicating the Hard wax and Klister zones on the classic ski. Klister is noticeably thicker once applied to the skis so the klister zone will be notably shorter than the hard wax zone on most skis.
Interpretation of Ski Characteristics based on Markings:
Based on the markings on your pair of skis you can derive some details regarding overall camber height and kick zone characteristics. A ski with a higher camber will have markings that are close together which indicates the more dramatic rise of the bridge. A classic ski with markings further apart shows the lower and less aggressive rise of the bridge that we typically see on classic skis that are more geared toward hard wax and thinner wax applications.
Kick Wax Application:
Once the camber height is established, and your zones are marked accordingly, the skis are ready for the application of kick wax. We will get into the basics of wax thickness but if you want detailed application techniques check out our detailed application video here: https://youtu.be/4h1D9HogaCQ
Application with H and K Markings:
If you have just the H and K marked on your skis waxing is quite straightforward; if you are applying a hard wax from a tin and keeping your application thin you can apply the wax all the way in between the front and rear H on the classic skis. If you are using Klister from a tube, keep the wax in-between the K in the front and rear of the kick zone.
The only grey area is when you are using Liquid Klister waxes or Klister mix waxes like we have really started to like and use a ton here at the shop. Examples would be the Start Oslo line of waxes, the Star M Series of waxes (M16, M21, M26), or Rex TK-1814. These waxes apply much thicker than normal hard waxes and generally need to be applied in a slightly shorter zone than other waxes out of a tin. Our suggestion is to shorten the back of the zone first, so apply the wax to the front H marking and the rear K marking to maintain kick but also improve glide when you are working with a thicker wax. This application method can be used when you are experiencing more drag than you would like but the kick performance is great.
Application with 0.2mm, 0.4mm, and 0.6mm:
If you have 0.2mm, 0.4mm, and 0.6mm marked on your skis this allows for more incremental changes to your kick performance on your classic skis. At the most basic level you can utilize your .2 and .4mm markings as a hard wax and klister zone as mentioned above, but having 3 markings in the front and back of the zone allows you to dial in kick performance further.
A brief overview of wax choices based on the 3 given thicknesses would be:
0.2mm: Most hard waxes (eg. Swix Blue Extra, Rex Violet, Rode Green Special)
0.4mm: Thin Klister and Klister Mix Waxes (eg. Start Oslo, Rex N41, Ice Klisters)
0.6mm: Warm Klisters and Klister Covered w/Hard wax (eg. Swix KX65, Guru 39 w/ Halligier Cover)
These are simply examples of waxes and the zones that we see traditionally correspond best with them; they are by no means the only zones to apply these waxes to and very frequently need to be tweaked and changed.
A few tips and tricks we have found for top ski speed:
You can almost always shorten the back of the zone by one increment without a significant impact to the kick performance if you are experiencing any drag out of your wax application. This in conjunction with moving your weight to your heels as you are descending lifts the pocket and camber allowing the skis to glide more freely.
In turn, if you do not have enough kick, you can apply the wax an increment further in the front if you have waxed to a shorter zone. This will expand the surface area of your wax allowing you to get more kick in conditions that are generally more icy or transformed.
The other way to achieve more kick is building up kick wax in the zone of the ski that has the most camber to it. This lies between the pin of the boot/binding and either the 0.6mm mark or K mark on the front of the zone. Since this is the highest area on the kick pocket you can add more wax without as much of a negative impact on glide. If you apply more and more wax to the entirety of the zone the skis will start to catch and drag much sooner since the very end of the bridge/zone is so low.
Significance of Camber Height in Ski Selection:
The choice of skis on a race day is influenced by various factors; including snow conditions, camber height, and wax selection. A ski with lower camber height (e.g., only 0.2mm or only a Hard wax zone) provides easier access to grip, making it suitable for colder and newer snow. Conversely, a ski with higher camber height (e.g., a clear 0.6mm zone) offers more depth for klister and thick wax application and is preferred for firmer or colder snow conditions.
Furthermore, camber height affects the distribution of weight and pressure along the ski, influencing stability and glide performance. By tailoring the camber height to specific conditions and individual preferences, you can significantly impact ski performance in specific conditions.